Monday, January 31, 2011

Winter homes

 It's dream time again...
Location: Franche Comté (France)


Sunday, January 30, 2011

Pom Pom Flowers - Easy tutorial

 
Via Poppytalk
Make some pom-pom makers the old-fashioned way . After your pom-poms are made add a bit of hot-glue to the end of a twig and insert into the centre of each pom-pom. Hold the two together until the glue dries (about 10 seconds) and then arrange.  (Photo by Kate Mathis).
 
Visit the Mad About Pink Shop Now!

Saturday, January 29, 2011

Pink and Green Farm House - My shabby Dream

Dream....Dream....Dream ... Please don't dribble on your pc....

Have a great week end... I'm off to cook a special something for my little one bday!


   All Via Campagne Decoration


Saturday, January 22, 2011

Tutorial: Turn your jar in a Mad About Pin...cushion!

 Happy week end!

Here's another tutorial I've done for you to recycle your jars. 
I real crafter should always have a pincushion, well, I didn't have one and I didn't want to spend a lot of money on it so I used items that everybody has at home, to make it as eco-friendly and cheap as possible.

Time needed: 20 mins

Material needed:

  • Fabric Scrap
  • Jar with Lid (I've used a bath salt one but baby food jar, olives, preserves jars or anything you like with a lid could do)
  • Scissors
  • Ribbon (I've used a 2 cm one (less that 1 Inch)  but measure your lid height before choosing it)
  • Hot glue gun
  • Batting
  • Needle and tread (any color as it will be invisible)

 I've used a cup with a diameter twice as big as the lid diameter
 to cut the circle of fabric
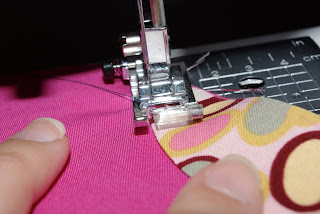
 Sew around the edges with large and quick stitches.
Below you can see the dimensions in respect of my jar
 
 Pull the tread from the 2 sides to close the fabric
 
 Fill with batting and make it really full and pull completely the tread and make a knot
 Now get the glue gun and spread the glue all over the lid.
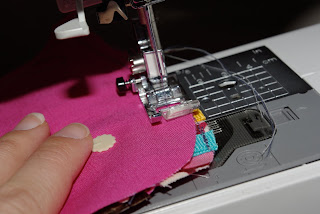
 Press really well the cushion on the lid in order to have all the side well attached. Get your ribbon and start adding glue on the side of the lid and press. I advise to do a little area at the time as the glue dries really fast. ( the stain in the picture is not blood :-), it's my son doing polka dots on it!)

And TA-DA-AM HERE it is. Pin your needles on it and store the rest inside!
 

Wednesday, January 19, 2011

Ready for Valentine's day? free printables DIY Love Notes

Project created by Amy of Eat Drink Chic via Oncewed
Loveletters 04
This DIY includes styling and presentation ideas for ‘Message in a Bottle’ guest favors with a twist. Enclosed is a little scroll that not only contains a message to your guests but also some extra blank notepaper so that they can write a little message back to the bride and groom and drop it in a jar labeled “Love Letters” incorporated in the centerpiece design of each table. - Amy of Eat Drink Chic
Loveletters 01
If you like the presentation ideas shown here you can download the various elements below and re-create the look for yourself.
Love_Heart_Doily_Label – Print onto white textured card and cut around border with scissors. Stick onto bottle with double-sided tape.
Loveletter_Heart_Doily_Label – Print onto white textured card and cut around border with scissors. Stick onto bottle with double-sided tape or punch a small round hole at top, slip some twine through hole and tie to jar.
Notepaper_Template – Use the PDF template to write your own message (IMPORTANT: You must download and install this free Travelling Typewriter font from Dafont to be able to use the template) then print onto paper of your choice. (I would recommend kraft paper for this design) Two of the sheets in the template can be edited to create your message, two are blank for your guests to use.
If this motif is not for you but you still want to utilize the idea then find or create your own labels that are more suitable for your wedding theme.
Loveletters 02
WHAT YOU WILL NEED
- Cheap small bottles, one for each guest.
- Large jar- one for each table.
- Attractive pens for guests to write their messages.
- Decorative twine or ribbon to tie around the neck of each bottle.
- Double-sided tape.
- Labels for each bottle and for centerpiece jar. Source, or create your own or download my designs above.
- Colour Printer for labels.
- Scissors for cutting out the heart labels.
- String, twine or ribbon to tie around each scroll.
- Notepaper – Source your own or download my design above. If you use my template, make sure to download and install this font first.
- Cutting board, scalpel and ruler to cut out notepaper designs.
- Rounded corner punch for corners of notepaper. (Optional)
Loveletters 03
MORE STYLING IDEAS:
- Present bottle as part of each guest table-setting.
- Include some colored confetti and/or small candy at the bottom of each jar.
- Personalize by attaching a mini gift tag to the neck of the bottle with the date and bride and groom names.
- Include a little sticker inside the bottle so that when guests write back to you they can seal their scroll.
- Instead of using the same type of bottle for all guests, mix and match different shaped bottles.
Loveletters 05

Visit the Mad About Pink Shop Now!

Tuesday, January 18, 2011

Kiwi's Etsy Love Swap #1

 Wow, I've posted here my treasury list for newly discovered shops I discovered on Swap-bot.
Wouldn't you like to have one of them?  Click on the image to access the treasury.

Don't you love the personalized wedding map? But also why not to get new earrings and join the good cause at the same time?(and I know what it is cause my husband is affected)

I'm a kawaii addicted? what could you do with these cute stamps?
Valentine day is coming and why not surprise your friends? and just because we are freezing down here but it doesn't mean we need to look like a snowman, look at these great crocheted hats!

And for all the Swappers friends a little discount on my etsy store! Code to use: kiwiswap

Visit the Mad About Pink Shop Now!

Monday, January 17, 2011

Pay it Forward 2011

Lauren introduced me to this and I think it's great.
Please leave a comment with a way to contact you!


Visit the Mad About Pink Shop Now!

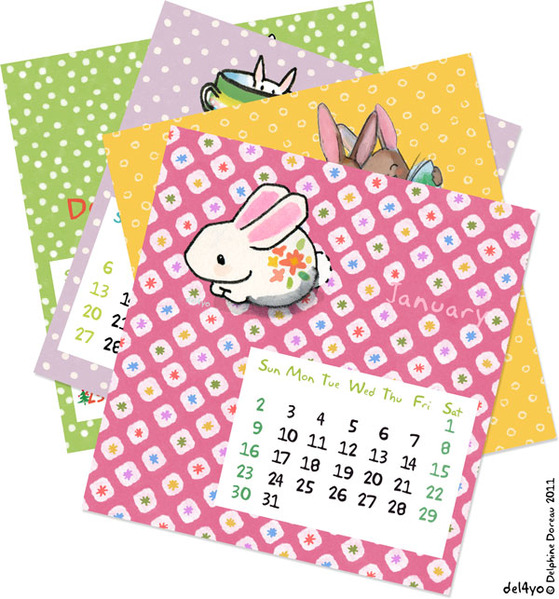
Printable 2011 Calendar - Free Download

I'm everyday more in love with this blog: Non Dairy Dairy

This is the cutest calendar ever and she's sharing it with all of us. Go here and simply click on the image. Enjoy!


Have a great week!


Visit the Mad About Pink Shop Now!

Thursday, January 13, 2011

Shopping in Pink


If you don't like pink please don't read!
I found this article on a French blog called MYDZ. You can see all details and where to get them from directly on the blog.
 They are such a must have! enjoy!


Visit the Mad About Pink Shop Now!

Tutorial: Owl Softie Ribbon Teether

I've just discovered this blog, the Rubber Punkin and I love it.

Here's one of her tutorial:

Owl Softie Ribbon Teether


1. Cut out your pieces. Owl body, owl wings, facial pieces, and ribbons. I just freehanded the body and the wings. But if you guys want me to post this as a pdf pattern, just let me know.

2. Fold the inside curve of the wings under about 1/4" and iron flat. You know how I feel about starch when it comes to making these creases. USE IT!

3. Sew the wings to the body. Get creative with your top thread color. I thing it adds a little whimsy when the stitches don't fade into the background.

See how close I stuck to the edge?

4. Place the facial features onto the face and sew on. I used wool felt for the eyes and the beak... it's a true obsession, me and wool felt.

5. Next fold a strip of ribbon in half. I prefer grosgrain ribbon so the texture can massage baby's gums when she's munching away on them. Pin the ribbon to the body with the rough edges at the edge and the folded end pointing inward. Arrange the ribbons around the wings like feathers, and two at the base like feet. Sew them on.

6. Now put the back to your owl against the front, right sides together, and sew it up. Be sure to leave a little opening to turn it right side out.

7. Go ahead and stuff it up with some batting.

Don't overstuff this little cutie. It's meant to be kind of flat so little fingers can hold onto it easily. Whip stitch that opening shut.

8. And there ya go! A nice little owl softie ribbon teether.

*** Due to multiple requests, you can now download the pieces to this owl for free by going here.
 
Visit the Mad About Pink Shop Now!

Wednesday, January 12, 2011

Saturday, January 8, 2011

{diy} pebbles

Who knew with a little white acrylic paint or vintage doilies could transform a basic beach pebble into a work of art.  


how pretty would those pebbles look scattered on a table ... think of all the possibilities


And the winner is....

Thanks girls for entering my giveaway, I love hosting them so much!
If you are not the winner, don't worry, I'll be hosting another one very shortly ( I was thinking as soon as the followers become
200!)
Using the Random Number generator,  
The number selected was comment n. 11 - Lauren

0 x 0

 Have a good week end!


Wednesday, January 5, 2011

New Features on Mad About Pink

Dear Mad Pinkettes,

as you can see Mad About Pink is growing therefore new changes were needed. Apart from the new logo, we've added more pages to make you part of this beautiful journey!
  • There is now a VIDEO TUTORIAL PAGE :
 If you would like to post your video tutorial here please email your video link (YouTube only)clicking this link and copying & pasting your link in the email with a brief description. I will then post it on my blog to the Mad About Pink community.
The best video tutorials will be placed here on this page permanently for the community. This helps people to find you too! 

If you don't have a video but just a photo tutorial, don't worry just email me your link or the photos and I'll take care of it. 
I cared so much about this part to be finished as it's so nice to share your  knowledge with people, don't you think? That's one of the main reasons that made me start blogging.
  • There is also a new MY SHOP PAGE:
This shop is all handmade by myself at "Mad About Pink"
Each Item is unique and I can also customize it to your needs & tastes.

As you may already know, I come from Italy although I was born in France and I speak Fluent English too so and I can send my products anywhere in the world, therefore please don't hesitate to ask shipping costs by emailing me your requests by clicking here or by going to my contact page.

The Shop's accepted forms of payment are PayPal, PostePay (Italy Only), Bank Transfer (Italy only). Alternatively if you see a product you like and have any questions, requests, customization needs or you wish to arrange an alternative form of payment please click here

Last but not least,
  •   you now can ADVERTISE HERE:
You can now advertise your own website, shop or service in a number of ways! Click here for details.

Did I mention before we have a facebook page too now? click here to view it. 
If you are a follower here or on facebook  and you subscribe to our free newsletter you have a 10 % discount on all products anytime.
Just let me know when checking out or by email.

Thanks a lot for supporting Mad About Pink!

Tutorial: Easy Plushies patterns

Hens and Mouse pattern

(all in French but easy to translate) poule tissu
poule tissu patron


poule tissu detail


couture souris


souris patron

LinkWithin

Related Posts with Thumbnails