My addiction for sewing is spreading, I've made so far anything possible and I'm going crazy for fabrics!!!! I've just ordered 50 zippers to make great designers pouch! Christmas is approaching and I'm hoping to take them all to markets.
Below I selected a nice and easy tutorial (sewing the leaves is a bit hard in terms of being precise but you can modify the main design according to your taste and skills... and it's a good way to use your scraps).
If you need to add coordinated fabric buttons, don't hesitate to ask, I can make them for you ready to ship the next day! Just send me an email and I can give you a quote (designer fabric from 2 Euros each 4!)
HAPPY WEEK END!
You’ll Need:
1. Scraps, enough for the tree trunk and the leaves. Cutting your scraps into rectangles will make it easier to adhere them to the appliqué material.
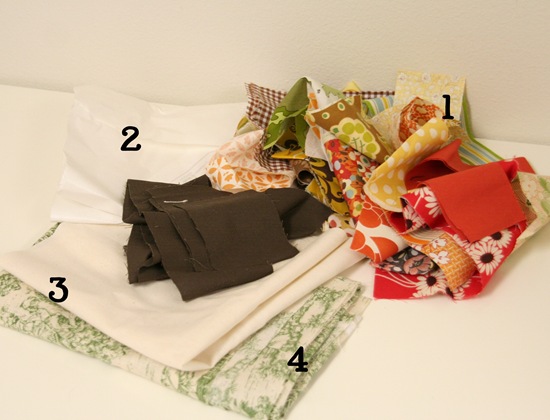
2. Appliqué material: I use Heat' n Bond. You’ll need about 1/2 yard or more depending on how many leaves you want to make.
3. Material for the pillow front, cut to 17" x 17" square. I used lightweight canvas and prefer home weight material, but you could use anything.
4. Material for the back. Cut 1 rectangle 17"x 14" and cut 1 rectangle 17"x 10".
Iron your fabric scraps onto your appliqué material according to the directions on the appliqué material. (press & hold the iron over each scrap for a few seconds, I use a very hot iron and find the appliqué material sticks better)
Now with scissors cut out your trunk and leaf shapes. For the trunk I first draw the shape of the trunk on the back of the appliqué material so I get a nice shape, but for the leaves I just free cut as I go. And for reference the trunk on mine is 8" tall, and my leaves are all about 2.5" long and are 1.5" or so wide.
When you get all your leaves cut out, tear the backing appliqué paper off the leaves and trunk. I prefer to do this while plopped down in front of the TV cause it takes awhile. :) Or better yet enlist some help.
Then you can arrange them how you want on your pillow front. Don’t place any within an 1.5" of the edges to leave room for sewing.
Once your design is how you like it, press with an iron over each spot for a few seconds making sure not to bump anything out of place. This will keep everything in place while you sew them on.
Now you can sew either along the inside edges of your leaves, or you can do a zig zag stitch or blanket stitch around the edges if you prefer. I move my foot from leaf to leaf without cutting my strings so it goes faster, then go back and cut my strings at the end.
To prepare your pillow back, fold one of the short edges of each pillow backing piece in 1/2" and press, then again 1/2" and press and sew to hide any raw edges. These will be the edges of the envelope back.
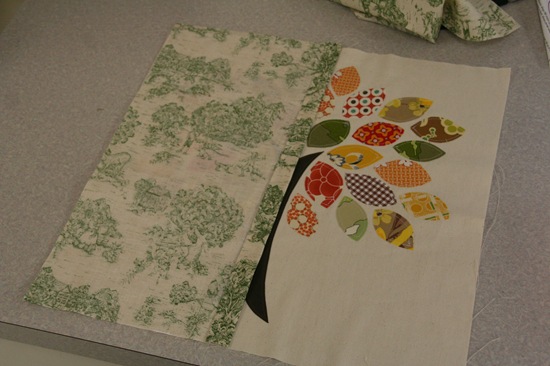
Lay the backing pieces right sides down onto the pillow front over lapping the centers. I placed the smaller backing piece ( 10" x 17") down first on the pillow front, but I actually prefer to lay the larger pieces down first since it makes the cover easier to slip on. Either way, make sure your right sides are facing towards the right sides of your pillow front and your outer edges match.
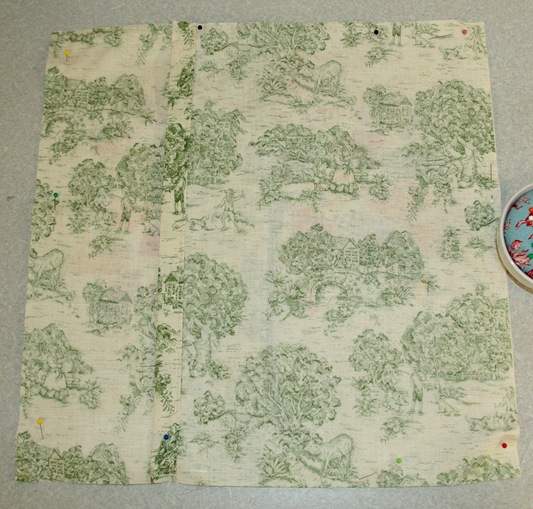
Pin around the edges well. Sew with a 1/4" inseam around the edges, backstitch over the envelope openings for extra strength. After the initial sewing I go around the edges with a serger, pinking shears or a quick zig zag stitch. Its especially important if you are using home weight fabric which tends to fray easily. Then clip your extra corner fabric off so the corners will turn nicely.

Then turn it inside out and stuff a 16" pillow form in it.
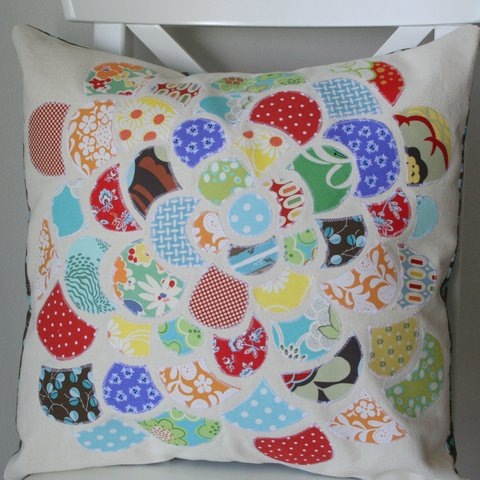
Here are some pillow covers I previously made if you want more ideas and to see how it looks with the zig zag stitch around the pieces.
for more tutorial visit CLUCK CLUCK SEW

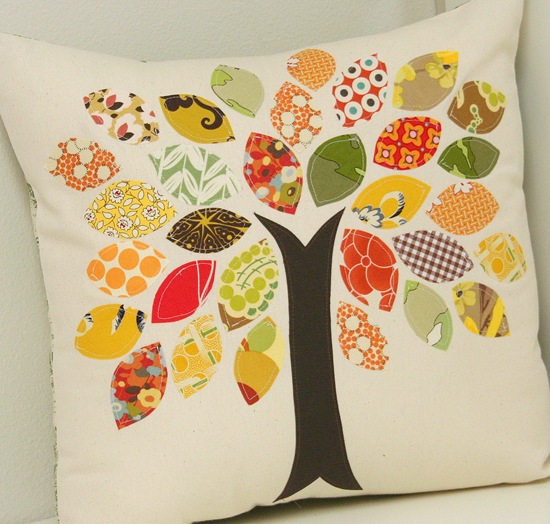

![[IMG_1157[4].jpg]](http://lh6.ggpht.com/_wKC1APrnMSY/St-_AA4ieVI/AAAAAAAAFDI/SXIKBxi7468/s400/IMG_1157%5B4%5D.jpg)

![[IMG_1165[3].jpg]](http://lh4.ggpht.com/_wKC1APrnMSY/St-_EodmXOI/AAAAAAAAFDg/AWejVweVnu0/s400/IMG_1165%5B3%5D.jpg)
o wow...those are so cute :D
ReplyDeleteYou are so amazing, thanks for the visit and dont forget to follow! I was so excited to have you!
ReplyDeleteOoooh, this is lovely, I'll have to try it!
ReplyDeletezilliah (from swapbot)
What a idea! And even better, it looks like something I can do!
ReplyDeleteDeidreart- swapbot- Art Blog
Adorable! What a great idea to use up scraps. I want one - the only problem is I don't sew!
ReplyDeletedarzy30 - swapbot
This is just awesome! I definately have to make one.
ReplyDeletedeb from Swapbot
Wonderful colour combinations.
ReplyDeleteHoi I am your swappartner / blogger swap. What a great tutorial. Thank you. Greetings YvonneCrea
ReplyDeleteHello! I absolutely love this tutorial and I saved it to my favorites! Great Blog! :)
ReplyDeleteSpokefactory from Swapbot.