Showing posts with label ideas. Show all posts

Tuesday, July 15, 2014

Customized Bracelets - so lovely!

Hello,
just a quick post to show you some more bracelets requested by Deby but this is also a chance to make you think about the meaning of working with other people. Well, I've realized that working on a commission based work is so gratifying. Most of the time you learn from them more than creating yourself. In this case, I would have never thought to add so many details to my bracelets and now I love the look. The beauty in this world is that we are all different with ideas, opinion and style. And yes, we are all inspiration to each other.
Thank you for inspiring me so much!


Tweet this post! Visit the Mad About Pink Shop Now!

Sunday, July 6, 2014

Fold towels in animal shapes: a tutorial for the all family

Good morning!
While dreaming about the holidays, I found this great tutorial for rainy days to make with your children. So your towel will be fold like in a cruise ship! Dream on!
The Ultimate Towel Folding Guide by Terrys Fabrics
The Ultimate Towel Folding Guide by Terrys Fabrics.

Funny isn't it? If you have photos, don't forget to email them to me.
ciao!
Jess
Tweet this post! Visit the Mad About Pink Shop Now!

Sunday, June 8, 2014

How to choose your necklace - a short guide

This weekend I dedicated my free craft time to design a necklace and while looking for inspiration, I found this useful guide from Imogen Lamport.

This is great as it gives you in a glimpse all the styles you need. So choose yours and start creating too :-)
 Happy Sunday!

Tweet this post! Visit the Mad About Pink Shop Now!

Friday, April 18, 2014

Free printable Easter card - Henrichetta & friends

At Easter she's the star, stealing the spotlight of the Easter bunny.
Henrichetta wanted me to put her on a greeting card so here it is for you. Just click on the image to download the file. And spread the Hens love.
 Download your free Henrichetta Easter card

See you tomorrow for another exciting post.
Jess
Tweet this post! Visit the Mad About Pink Shop Now!

Friday, December 27, 2013

How to reuse your wrapping paper leftovers... recycling is good

Because I love recycling, here some ideas on how to use your wrapping paper from Christmas presents.


Create a Party BannerCreate a party banner!

Dress up your Office supplies
Make bookmarks!
Create color coded labels!
Use it as frame background!

Cover your Books!
Make Napkin rings!
Recycle Gift Wrap via homework (8)Use a hole punch to create many decorations for your packages!

This is just a little list of ideas....but enough to make you think about how easy it can be to use leftovers.
Have a great day!
Jess
Tweet this post! Visit the Mad About Pink Shop Now!

Sunday, October 6, 2013

Halloween DIY: Minions pumpkins via CraftberryBush

Look at this! Isn't that such a great tutorial to do with kids, without damaging your fingers carving?
You can find the full instructions at Craftberrybush

Happy week end,
Jess
Tweet this post! Visit the Mad About Pink Shop Now!

Sunday, August 25, 2013

and from the leather leftovers ...a necklace

Why throw away leather scraps? here's what I made from the leftovers of my leather folded clutch I showed you last week.

I hope you like it...


Apologies for the bad photo but I took it from my mobile. Tutorial will come soon.

Jess
Tweet this post! Visit the Mad About Pink Shop Now!

Friday, August 23, 2013

Faux Leather folded clutch DIY - quick tutorial

Hello, being on holiday is fantastic!
I'm relaxed, I enjoy spending time with my kids and I also have some time left to create. I needed it so much.

I'm attending a wedding next month and I didn't have a matching handbag to my grey/black/white dress so here what I made.

Material:
2 pcs faux leather silver (smaller than a FQ)
2 pcs ''              '' black (smaller than a FQ)
1 white lace
4 pearls
white ribbon
1 black zipper 
1 magnet closure (optional)

I didn't use any lining as the leather had a nice finish at the back. So I just cut precise edges and started sewing like a normal pouch.....this is what a call a nice SHORTCUT.... lining would have been nice though but it's too late now.

Of course it's not real leather. This is what I call Cheap and Chic solution so my hubby won't complain about me spending money on accessories.

The dress I'll be wearing is this one, with this hat:

I hope you like it as it was my first try using faux leather. If you need any help, just leave a comment.

Have a good day!
Jess

Friday, May 10, 2013

Graduation favours - a little project for my sister

My little sister graduated and here's some favours I made for her. What do you think?

I got some honey and personalized it.  So it's something useful that people will remember while using it.


A little ladybird on top for good luck (and I wish her tons of it) - Some excellent quality ribbons and the trick is done.


Do you like it? I can personalize it for you. The honey comes directly from a small honey producer and it's very good. All healty food of course.
Have a good week end,

Tweet this post! Visit the Mad About Pink Shop Now!

Thursday, January 24, 2013

Storage Solutions for Tiny Bathrooms

It's hard to contemplate the best way to store all the stuff that we try to cram into our bathrooms. From necessary items like towels and toilet paper, to the piles of products we use, to decorative elements, the smallest rooms in our houses have a big mission. This is challenge enough in an average sized house, but what can you do about storage when you live in a small apartment or end up with an extra small bathroom? Don't worry - home designers have been coming up with some incredibly innovative solutions to this all too common problem.
Install a ledge shelf: Consider installing a ledge style shelf above your sink and under your mirror. It doesn't take up a ton of space, but it creates flat surface to scatter products, brushes, shaving cream, and the like while you're getting ready in the morning.
Turn your door into another wall: By using a little magnetic paint, you can create a surface to attach everything from hand mirrors to towel bars. This can also be valuable space to attach magnets and other funky decorations to give the small space some flavor.

Source: apartmenttherapy.com
Mirrored storage: If you need more storage space and you need options for looking in the mirror, consider checking out mirrored storage. Shelves can be combined next to wall mirrors, and cabinet doors can be affixed with mirrors to help achieve two goals at once!
 
Source: homeizea.com
Get creative with towel storage: If shelf space is at a premium, several fun ideas are floating around on where to keep the towels (and they're way more creative than a towel bar on the back of your door!). Pegs beneath a ledge shelf or shelving unit are a great way to go. You can also repurpose a coat rack for a towel tree: the slender body fits easily in a corner while providing ample storage.

Source: countryliving.com
Hanging baskets: If wall space is plentiful even though floor space is limited, consider hanging baskets. Wooden baskets or woven baskets can be hung from pegs on the walls and hold hand towels, soaps, and bath products with ease.
Think in tiers: Tiered storage can help you make the most out of what space is available to you. A plant stand in the corner can be converted to provide four or five levels in a tight corner. If you are yielding precious counter space to a bowl, why not seek out a multi-level bowl and maximize your vertical reach.

Source: apartmenttherapy.com         
Convert a magazine rack into a towel holder: Towels can be some of the bulkiest things to store. Remember those multi-pocketed magazine racks in the doctor's office? A simple paint job can easily convert them into something you can hang on the wall and stash some hand towels and bath sheets.

Source: thriftyandchic.com
Look over the toilet: Over the toilet may not be the most obvious place to look for solutions, but shelving and towel racks can easily be installed there. You can even add multiple layers of storage, or add a second DIY medicine cabinet to make the most of the space.

Source: shelterness.com        
Pull-out shelves: Pull-out shelves are a clever way to take advantage of vertical space and create more storage, without the first thought a visitor has being "wow, they've really optimized this for storage!" It's subtle and sleek, and it gets the job done.
No matter how tight your bathroom, with a bit of ingenuity and planning, you can turn your tiny space into a storage giant! What's your favorite small room storage solution?
About the Author: Jerry Davidson is a father of two and a home improvement fanatic. When he’s not revamping his own home, you can find him reviewing products for door companies in Chicago.


Tweet this post! Visit the Mad About Pink Shop Now!

Saturday, January 12, 2013

Another necklace with my tricotin

 Here's another necklace I made with the tricotin...do you like it? Its really addictive this thing..
And for all of you, who didn't know...here's is my little wonder! almost 4 months, time flies and I love him even more. Finally my family is complete: my 3 men and I.

Tweet this post! Visit the Mad About Pink Shop Now!

Monday, December 10, 2012

Feeling creative...presents and experimenting

hello pinks,
Xmas is almost here and I've been quite busy with a new born and my little shop but I couldn't resist to make something for a little girl that turned 5:


 For someone that graduated:
and for my shop or maybe for myself :-)


 And as soon as I finish, I'll show you some more....
Enjoy and be creative

Tweet this post! Visit the Mad About Pink Shop Now!

Thursday, November 29, 2012

Kraft deco ideas

Hello Mad Pinkettes,

sorry for me not posting as regular but a newborn baby that doesn't sleep makes you a bit slow during the day.
While reading some sites looking for packaging ideas for the Christmas presents I found this via Hey Look, a great source of ideas:


A DIY tutorial on how to make your own geometric table runners. We're loving the cut of these, and the dotted runner is so cute! Tutorial by Jordan Ferney of Oh Happy Day (photos: Pretty Simple Productions)


Beautiful calligraphy adds so much elegance to kraft! We found the idea in this summer cherry wedding (photography by Jose Villa).


Another geometric runner spotted in this inspiration shoot featured on SMP // photo: Rachel Peters


A kraft table setting for a flower work shop. Pretty! Featured on 100 Layer Cake // photography: Scott Clark

But I've also found this:

 not just for kids tables...
 from Sweet Paul

or this
Decorate kraft paper bags for unique elementary school valentines
from Grey Likes baby

but I have so many other ideas in mind. Vintage ones using doilies, washi tape and a lot of recycled ribbons.

Enjoy!
Tweet this post! Visit the Mad About Pink Shop Now!

Wednesday, November 28, 2012

Christmas this year....by Eva


Hello Mad About Pink readers. I am Eva Stephen. I am so happy to be here. The following post would give you the blend of traditional as well as modern decoration ideas for Christmas. I hope it helps and gives you inspiration for Christmas decoration this year.

Christmas is just around the corner, so let’s get down to creating a plan how to make your home as lovely as possible for this special day. How about doing something a little different this year? I am going to suggest several different decoration ideas and you’ll see which one best matches your home and your sense of style.


Introducing Purple as the Colour of the Year

Christmas colours are usually green, white and red. How about adding a new colour to your decorations? Purple is very rich and festive, and could be a beautiful addition to your décor. Add purple Christmas balls to your tree, purple balloons bouncing around the room and some other purple decorations that we’ll talk about. The colour of your dress or shirt on Christmas Eve could also be purple.

Hello, Crafts and Designs

If you have children, or even if you don’t, it could be a lot of fun to organize a day well ahead of Christmas to make some interesting decorations. Don’t rely on stuff that you can buy, but try to create something new and original. Some fresh ideas you can consider are:

1) A life-size Santa made out of cardboard and placed next to the
Christmas tree, in a position as if he’s putting presents under the tree.

2)
Sparkly stars sewn to the curtains, falling from the ceiling (hanging from a think piece of thread) or stuck to walls, doors, etc. You should have some purple stars, too.


3) Balloons everywhere! Check out Christmas balloons from Party Box.

4) Fake presents – though you’ll have real presents underneath the tree, you can have boxes in shiny paper and of different sizes appearing from unexpected places – when you open a cupboard to get something, from underneath the bed or sofa, peering from underneath the pillow, etc. You can also play a game titled: “Guess which fake present is not really fake?” which you could play towards the end of the evening and have a race who’ll find the real gift among the “false” ones.

5) Place anything shiny around the house on the floor so that it will sparkle in an unusual way (pieces of fake jewellery, glass, stones, etc.)

You can also try to find new ideas online or in magazines and introduce a new look to your home for Christmas.
Don’t Overdo It

It is very important not to get caught up with decorating and lose track of what’s within the limits of good taste. Naturally, Christmas is all about having a glowing house full of
ornaments and lights, which would look funny any other ordinary day of the year. But there’s still something called “too much Christmas decoration”. So, if you’re decorating your front porch, make it subtle and pleasant to the eye, rather than chaotic.

Decorate Every Room

You want your whole house to enjoy the holiday. Don’t let the bedroom furniture feel left out. Check out latest
stock from this website. Bring in decorations to your study room, kitchen and bathroom as well. Use covers, blankets and pillows that look a little more festive than the ones you regularly use, if you have any. Have fresh flowers in vases in every room. Music is also very important contributor to the Christmas mood; it would be nice if you could hear it from almost any part of the house, even if just slightly.

Now that you have everything ready – sparkle, merry colours, good lighting, music, Santa handing out gifts – you’re ready for celebration.


Tweet this post! Visit the Mad About Pink Shop Now!

Thursday, September 6, 2012

Baby gifts tutorial: Sushi

 As you know I have just few weeks to go before my second cutie arrives so I tend to look for nice tutorials for Newborn babies....well, have a look at this one via Tipjunkie.com from Creative dollar blog. It's so full of ideas...

Target for only $17:
She's having a girl so I picked pinks and reds as the color scheme and they also apply well to raw fish colors. I also needed a plate to display it all on and I found this at Target for $2:
I thought it looked kinda oriental and the colors were perfect.
Supplies:
3 pack white onesies $7
3 pack washcloths (2 white, 1 pink) with fish toy $5
2 pair socks (1 red, 1 pink) $2
1 pack of 4 clip on hair bows $3
1 decorative plate or platter $2
1 black plastic table cloth $1
Tools
rubber bands on hand
clear tape on hand
scissors on hand

First, remove all the tags and separate the items.
Take the two white wash clothes with pink trim and fold them in half twice the long way so that when you roll it up, the pink is in the center. Towards the end of the roll, tuck the last bit under so the pink doesn't show. Repeat white the other white wash cloth. Secure with rubber bands. You now have two maki.

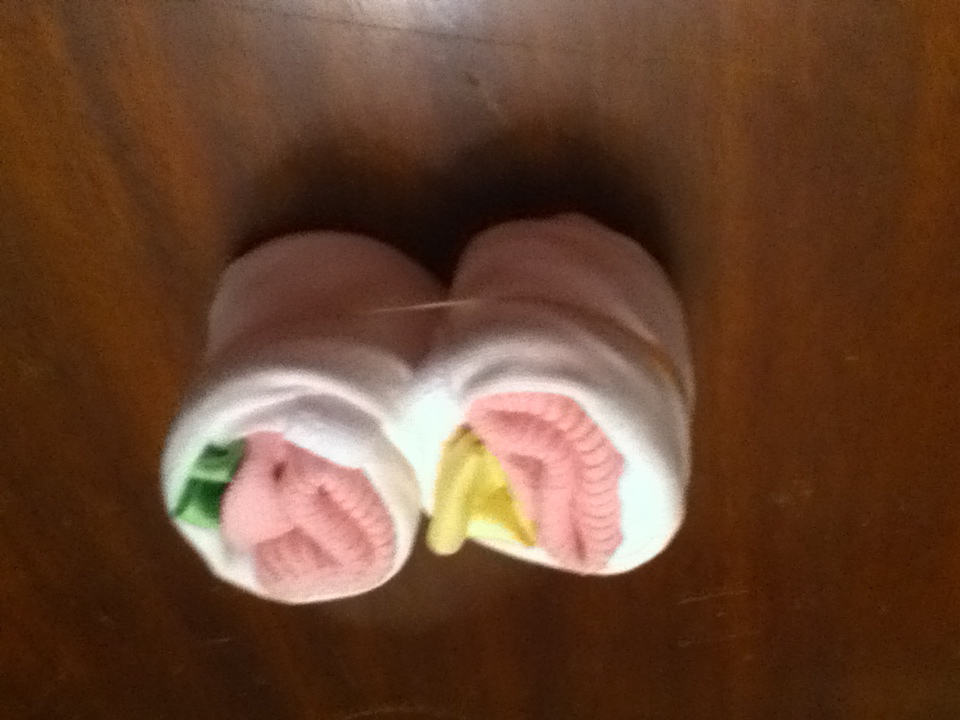
Take one onesie, a pair of socks and two hair bows, these will form two maki. Turn the onesie face down on the table and fold both arm sides in. Then fold in half the long way. You should have a long white strip. fold a sock in half (toe to the top of the cuff edge) and lay on the edge of the strip so that the sock cuff edge is flush or just past the edge of the white strip. Top with a hair bow and roll tightly to the center of the strip. Carefully hold that roll in place and turn the whole thing over. Then repeat on the other side, being careful to place the sock cuff edge on the same side as the other, and roll towards the center. You should have a double S shaped roll. Secure the whole thing with a rubber band. Repeat with a second onesie, the other pair of socks and the other two hair bows. You now have 4 more maki.


Place the final onesie face down on the table and fold arm sides to the middle. Fold the pink wash cloth in thirds and place atop the folded onesie. This will give your sushi more thickness. fold the bottom edge of the onesie over the wash cloth and then fold 3 more times forming a rectangular shape. This is your sushi rice. place the fish toy on top and secure with 2 rubber bands.
Here's all your sushi so far:
Now to add the black nori seaweed wrappers. Open the black plastic table cloth and unfold once. cut along the first fold and open that piece up. You should have a long strip of plastic. fold that piece in thirs the long way to give the strip nice clean folded edges. Adjust the width to best suit your sushi. wrap the strip around the sushi's middle and cut to size. Tuck in the end for a clean finish and secure with tape.

Repeat to make strips for the maki. The washcloth ones are easiest. Simply wrap, tuck the end and secure with another rubber band.
The others are more tricky. you need to take off the rubber band and hold the rolls securely. Slightly unroll one end and start wrapping with the plastic strip. When you get to the other edge, make a V fold and tuck it into the place where the first roll touches the second. Then continue wrapping the other roll, trimming the plastic strip to fit, and secure the whole thing with a rubber band. Adjust the plastic wrap to make it look nice if needed and tighten it up by pressing a butter knife or pencil into the V fold area and ends. Repeat with other set of maki.

Place all the elements on a plate. You should now have this:
If you want, you can top the whole thing with a pair of chopsticks or two. I used ones from home that I bought at an asian market in a huge pack.
I then taped the gift receipt inside the card, signed it and slipped it in the envelope. I printed out this label and taped it to the outside of the envelope and decorated it with scrapbooking stickers.
Here's what it said:
INCLUDES:
For Baby
3 short-sleeved bodysuits
2 pairs of socks
4 clip on hair bows
3 baby washcloths
1 bath toy sponge
For Mom & Dad
1 serving platter
2 pairs of chopsticks
Finally, I put the whole thing in the shrink wrap bag with the card underneath. The corners stuck out so I folded then twice and taped them down in back. Then I tied it off and trimmed the excess on top.


Tweet this post! Visit the Mad About Pink Shop Now!

LinkWithin

Related Posts with Thumbnails