Pages

Sunday, September 26, 2010

Get well soon!

This is a get well soon for Sara, the other member of the Mad About Pink team that had an operation!
 My son has decided to give her his best teddy Juju. We can't wait to create again with you so hurry to get well!


Mad About Pink

Tutorial: Fall Pillow from scraps


IMG_1189

My addiction for sewing is spreading, I've made so far anything possible and I'm going crazy for fabrics!!!! I've just ordered 50 zippers to make great designers pouch! Christmas is approaching and I'm hoping to take them all to markets. 

Below I selected a nice and easy tutorial (sewing the leaves is a bit hard in terms of being precise but you can modify the main design according to your taste and skills... and it's a good way to use your scraps).
If you need to add coordinated fabric buttons, don't hesitate to ask, I can make them for you ready to ship the next day! Just send me an email and I can give you a quote (designer fabric from 2 Euros each 4!)

HAPPY WEEK END! 

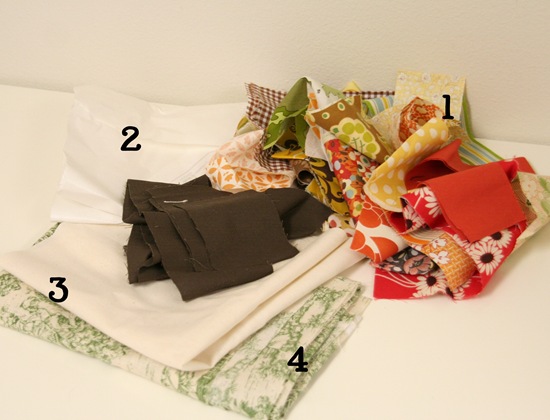
You’ll Need:

1. Scraps, enough for the tree trunk and the leaves. Cutting your scraps into rectangles will make it easier to adhere them to the appliqué material.
IMG_1151-1

2. Appliqué material: I use Heat' n Bond. You’ll need about 1/2 yard or more depending on how many leaves you want to make.

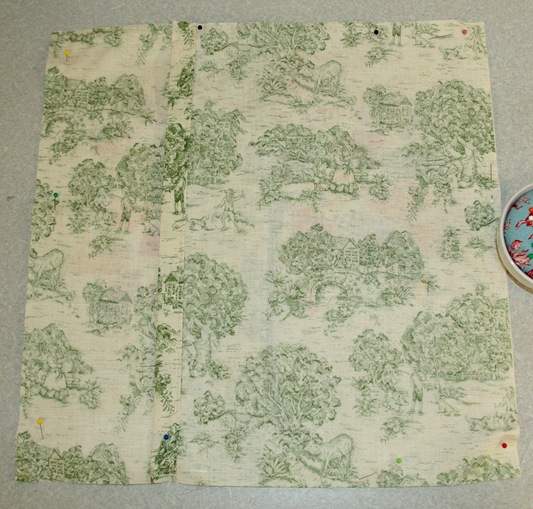
3. Material for the pillow front, cut to 17" x 17" square. I used lightweight canvas and prefer home weight material, but you could use anything.

4. Material for the back. Cut 1 rectangle 17"x 14" and cut 1 rectangle 17"x 10".

Iron your fabric scraps onto your appliqué material according to the directions on the appliqué material. (press & hold the iron over each scrap for a few seconds, I use a very hot iron and find the appliqué material sticks better)

Now with scissors cut out your trunk and leaf shapes. For the trunk I first draw the shape of the trunk on the back of the appliqué material so I get a nice shape, but for the leaves I just free cut as I go. And for reference the trunk on mine is 8" tall, and my leaves are all about 2.5" long and are 1.5" or so wide.


IMG_1160[IMG_1157[4].jpg]


When you get all your leaves cut out, tear the backing appliqué paper off the leaves and trunk. I prefer to do this while plopped down in front of the TV cause it takes awhile. :) Or better yet enlist some help.

Then you can arrange them how you want on your pillow front. Don’t place any within an 1.5" of the edges to leave room for sewing.

Once your design is how you like it, press with an iron over each spot for a few seconds making sure not to bump anything out of place. This will keep everything in place while you sew them on.


IMG_1164
Now you can sew either along the inside edges of your leaves, or you can do a zig zag stitch or blanket stitch around the edges if you prefer. I move my foot from leaf to leaf without cutting my strings so it goes faster, then go back and cut my strings at the end.
[IMG_1165[3].jpg]

To prepare your pillow back, fold one of the short edges of each pillow backing piece in 1/2" and press, then again 1/2" and press and sew to hide any raw edges. These will be the edges of the envelope back.

IMG_1171

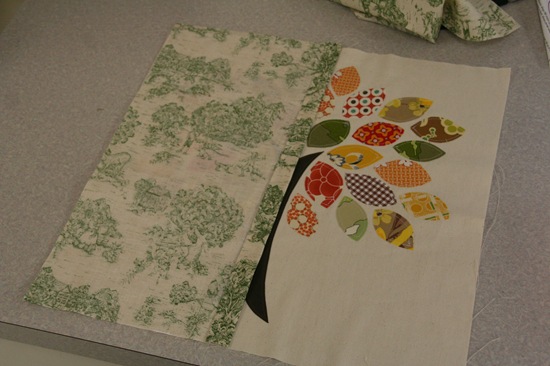
Lay the backing pieces right sides down onto the pillow front over lapping the centers. I placed the smaller backing piece ( 10" x 17") down first on the pillow front, but I actually prefer to lay the larger pieces down first since it makes the cover easier to slip on. Either way, make sure your right sides are facing towards the right sides of your pillow front and your outer edges match.

IMG_1174

Pin around the edges well. Sew with a 1/4" inseam around the edges, backstitch over the envelope openings for extra strength. After the initial sewing I go around the edges with a serger, pinking shears or a quick zig zag stitch. Its especially important if you are using home weight fabric which tends to fray easily. Then clip your extra corner fabric off so the corners will turn nicely.

IMG_1180
Then turn it inside out and stuff a 16" pillow form in it.

3427414485_c9a0e201f8_o

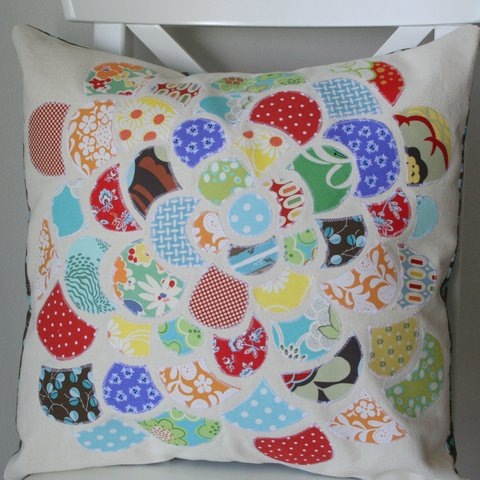
Here are some pillow covers I previously made if you want more ideas and to see how it looks with the zig zag stitch around the pieces.
for more tutorial visit  CLUCK CLUCK SEW

Sunday, September 19, 2010

Free Printable French Labels

Happy Sunday,

today, I've been working on new fabric pouches for my shop and some other ideas (shhh, it's a secret!) and I've decided to share with you my obsession with fabric and labels.

These are some fabulous very old French labels, I believe they were used for textiles or ribbon. If you look closely you can see that most have a place for the yardage amount. These came out of a circa 1857 scrapbook. 

Click here for the pdf down load or visit The Graphic Fairy

Thursday, September 16, 2010

Free download: Romantic Notecard set

Don't you love this set?

I'm ready to print it for any occasion.

Click here to DOWNLOAD via Ruffles

Wednesday, September 15, 2010

Featured again and working on more projects...pillows and more fabric goodies

Hello, 
 
again on Dawanda one of my creations has been featured... I'm so happy! especially now that I'm starting to prepare for the Christmas markets.

I have several new projects...here's a sample... a bad quality image taken at midnight ... yes, with a baby it's the only time I have left...but it's so quite and I love it! do you like them?


Mad About Pink

Tuesday, September 14, 2010

Vintage bottles


I've been visiting a lot of antique markets lately and I got obsessed with old bottles. I was looking for blue or pink ones but they were really too expensive...80 Euros each... so I decided to recreate the same look with other ones less famous. I kept some for my shop... 
I like to share my findings but most of the time I find hard to separate from them when shipping.
These two bottles below can be purchased ...

I also found nice pictures around the blogosphere! Enjoy!


Mad About Pink

Monday, September 13, 2010

Cheshire cat is now mine!!!

This is a big thank you to NoodleBubble! I won her Cheshire cat!

She makes such lovely brooches and more... an example? visit her SHOP

The other amazing part is that she also has time to host some swaps... can't wait for more buttons ones!!

THANKS A LOT!

Tuesday, September 7, 2010

Accessories: Vintage Mirrors Painted White

This post is to convince my dear friends Luca and Cinzia that their efforts to carry 2 stunning white Mirrors from Bath to the airport in a tiny car and 5 people in it was worth it. My bedroom is stunning! Thanks to my hubby for putting it up! I'll add a photo very soon.
Luca and Cinzia in the car...
Dowdy or overly ornate mirror frames become summery and modern with a coat of white paint, as shown in these spaces.
Above: A living space via OWI.
Above: A bath in London, via 1st Options.
unfinished-baseboard-inspace-7.jpg
Above: A hall mirror painted white in a London townhouse, via Light Locations.
Above: The Brooklyn living room of designer Edward Wilkerson, via New York Magazine.
Above: A collection of mirrors painted white in designer Annie Coggan's bathroom.
Above: A hallway spotted on Yatzer.
Above: A wall featuring white painted mirrors at the Brass Razoo.
via Remodelista.com
Mad About Pink

Wednesday, September 1, 2010

Copenhagen style

Here's a nice house located North of Copenhagen! I love the whites and all little blue details around it!
I would have chosen a warmer contrast in the pink shades but I still would live in it.
Enjoy!
Mad About Pink